Today I'm going to be talking about something I love to use in my photography, Negative Space! Negative space refers to any space in an image that....that's it!; "any space in an image!"
Some people might disagree with that extremely tiny definition, and I understand why they would. Negative space can be used in MANY ways and can become anything within the frame of the photograph. I'll try to explain this with some of my photography (Nothing better than actual examples!) :
If you have any questions about my pictures, posts, or photography over all send me a message or comment below (comments are preferred since they may serve the purpose of answering the question for everyone with similar questions.) If you like this post please tell me below and share it on your social media sites, and remember SUBSCRIBE!
Keep Snappin',
ravimi
Friday, June 8, 2012
Thursday, June 7, 2012
One of those Randoms! ~ "The Golden Hours" follow up
So we have another new member on the RPB!! Their name is "Christian Udarbe" and I would like to welcome you on our journey with photography. I read your (Christian Udarbe) comment on "The Golden Hours" post and it gave me an awesome idea.
IDEA: I would like to invite all the photographers who read this to submit 1 photo (each) with the theme "The Golden Hours". This means that the picture has to be taken during the time of day where the sun is either rising or setting (no limitations on what the subject is; it can be a portrait, it just has to be on that time of day). Feel free to add a signature anywhere on your own picture BUT refrain from messing it up (don't clutter the image with signatures, this includes logos, or I will not post it). You can submit the picture to my email ravimiart@gmail.com AND please make sure the longest side of the image is at least 800 pixels. Thanks for your time and remember to SUBSCRIBE!
Keep Snappin,'
ravimi
Wednesday, June 6, 2012
Photo TIPS! ~ Fill Light
Today I will be talking about Fill Light! The last post talked about "The Golden Hours" (pretty holy stuff) and I mentioned fill light when talking about the effects of the morning and evening sunlight (The Golden Hours). The light from these times of day seems to envelope the subject from multiple directs because the main light (sun light) is not so powerful as too outmatch the Fill light. Well, what is fill light?
Fill light is soft (softer than the main light) light that is used to expose the features of a subject that might be hidden by the shadows created by the main light (the main source of where the light is coming from, ex: sunlight, light bulb, etc.). In portrait photography fill light very often comes from a reflector.
This is a light reflector. It is positioned at an angle that will help redirect the light (that is not heading towards the subject) towards the subject. This will help light up multiple sides of the object. |
A reflector can be many things: a wall (preferably light colored walls, dark colors absorb to much of the light unless the subject is right against the wall), a table, a ceiling, and many other surfaces that redirect light in a desired direction.
If you have any questions about my pictures, posts, or photography over all send me a message or comment below (comments are preferred since they may serve the purpose of answering the question for everyone with similar questions.) and remember SUBSCRIBE!
Keep Snappin',ravimi
Some photographers use flashes in order to create fill light. Flashes can be positioned in multiple angles, and some can even be shot independent of the actual camera. One example of using Flash as fill light is when I took the picture of the baby below. This picture was taken under a 10x10 beach tent at night. I did not want to much light coming from one direction to hit the babies face so I angled the flash directly upwards. By doing so, the light from the flash bounced off the tent's ceiling and so the entire tent became a huge light box. By examining the picture you will see little, too none, notable shadows that are over powering (the background is dark because I took this outside during the night and so the amount of light inside the tent drained out the visible objects in the background, and a low f/stop also helped).
Bounce light is VERY useful, especially during portrait photography. So make sure to be aware of it's usefulness and how to best control it. Observe your surroundings for possible "reflectors" (i.e. walls, tables, flat surfaces) and be creative with light sources and when to take pictures (refer to my "The Golden Hours" post).
Keep Snappin',ravimi
Tuesday, June 5, 2012
Photo TIPS! ~ "The Golden Hours"
First I would like to start off by welcoming the first ever follower of RPB (Ravimi Photography Blog) "TheLittlePictureBox"! Yay (fireworks in the background, while drunk people fall over from the after after after party). Thanks for joining me on the journey through photography!
Now back to the normally scheduled program. Today I would like to discuss "The Golden Hours" which I referred to in the last "Photo and Personal Style" post. The Golden Hours refers to a time of day in which photographers in the photography community (I know, redundant) generally have dubbed "The best time of the day for taking pictures". The reason for the nice title is because it's a time when the sun gives off it's most vibrant light. This time is from when the sun rises to about 9-10am, and when the sun is setting, mostly the period after 5pm (lol, sorry Alaska), to when it is completely gone. I'm sure a lot of you, if not all, have seen a picture of the sunset/sunrise, it contains vibrant colors that shine beautifully which is one of the reasons it is so greatly praised.
During "The Golden Hours" the sun light can be strong but it is coming from an angled direction that is not directly above. Sunlight during the middle of the day, in most cases, is very harsh and may cause pictures to look bleached out (over exposed) even when the settings have been adjusted. The reason for this is because shadows created by the harsh light creates too much of a contrast which will make skin exposed to the light look "washed out" relative to the darkness of the skin that is covered by shadows. I would describe this effect similar to that of a camera trying to take video of a dark subject while there is a light reflector surrounding the subject and is pointing directly at the lens. Midday light comes directly from above which is not always forgiving towards the person being photographed. The example picture of the foot prints below (Image is called "Bajo Relieve") shows how shadows from the Golden hours can be used, and how midday sun can actually destroy interesting shadows.
The light of "The Golden Hours" comes from a lower angle and this allows the photographer to dictate where the model will stand for the best exposure. The less-harsh light seems to wrap around the subject because there is very little contrast between the actual direct sunlight and fill light (light that is reflected from surfaces or comes from other mediums with the purpose of lowering the amount of contrast created by the main source of light: in other words I'll leave it for a later tutorial). An example of this is the portrait below.
So be sure to use "The Golden Hours" as a very important tool. It serves as a great time of day when the sun creates favorable and colorful light, and is also the coolest part of the day (excluding night of course).
If you have any questions about my pictures or photography over all send me a message or comment below (comments are preferred since they may serve the purpose of answering the question for everyone with similar questions.) and remember SUBSCRIBE!
Keep Snappin',
ravimi
Now back to the normally scheduled program. Today I would like to discuss "The Golden Hours" which I referred to in the last "Photo and Personal Style" post. The Golden Hours refers to a time of day in which photographers in the photography community (I know, redundant) generally have dubbed "The best time of the day for taking pictures". The reason for the nice title is because it's a time when the sun gives off it's most vibrant light. This time is from when the sun rises to about 9-10am, and when the sun is setting, mostly the period after 5pm (lol, sorry Alaska), to when it is completely gone. I'm sure a lot of you, if not all, have seen a picture of the sunset/sunrise, it contains vibrant colors that shine beautifully which is one of the reasons it is so greatly praised.
![]() |
This is one of my Sunset pictures, taken on Christmas day. |
The light of "The Golden Hours" comes from a lower angle and this allows the photographer to dictate where the model will stand for the best exposure. The less-harsh light seems to wrap around the subject because there is very little contrast between the actual direct sunlight and fill light (light that is reflected from surfaces or comes from other mediums with the purpose of lowering the amount of contrast created by the main source of light: in other words I'll leave it for a later tutorial). An example of this is the portrait below.
So be sure to use "The Golden Hours" as a very important tool. It serves as a great time of day when the sun creates favorable and colorful light, and is also the coolest part of the day (excluding night of course).
If you have any questions about my pictures or photography over all send me a message or comment below (comments are preferred since they may serve the purpose of answering the question for everyone with similar questions.) and remember SUBSCRIBE!
Keep Snappin',
ravimi
Monday, June 4, 2012
Photo and Personal Style
This picture was part of my first big profit job. The model wanted some pictures taken by me because he liked my personal philosophy of capturing the person for who they are, and he also enjoyed my pictures he had seen. Knowing his personality I decided it would be nice to have an outdoors photoshoot with strong colors (as shown by the strong blue sky and yellow shirt) and strong energy being radiated by the model. We went out to a nearby dock since it was far away from trees and buildings that could get in the way of the framing. We also started the shoot in the afternoon, around 5-6pm, so that the sun was close to the horizon while still maintaining enough light for the picture (this is referred to as the "Golden Hours", I will go over this in a future tutorial).
The model has a strong body figure, he is very fit and has had experience with modeling professionally so I decided to give him a look that showed his strength and inner power. I took the picture from below to make him appear larger than life and made sure that his elbows would not fall outside of the frame while maintaining a tight composition that also pushed the idea of his thin figure. The negative space (refers to the empty space) helps bring out the idea of internal strength/spiritual power (I will go over the use of Negative space in a future tutorial). And lastly I always made sure to help him give off a feeling of strength accompanied by a relaxed aura.
If you have any questions about my pictures or photography over all send me a message or comment below (comments are preferred since they may serve the purpose of answering the question for everyone who sees it.)
Keep Snappin',
ravimi
Sunday, June 3, 2012
Photo TIPS! ~ Photography Equipment; when to buy it.
When I started photography as a hobby (as something that I actually decided to give time too) I began with a Casio EX FH100.
It's a point and shoot camera that I spent MONTHS researching because I had a budget, and I knew if I was going to buy something that I was going to make into a hobby then it was going to be the most bang for the buck. Anyways this camera served me well, so well it last me about 5 months. I'm not being sarcastic. This Point-n-Shoot camera opened the doors of the photographic world to me. I took it EVERYWHERE and for those 5 months I took more than 10 thousand pictures. I used it so much that I joined my schools yearbook team and actually became the unofficial school photographer [I was allowed to carry my camera in my hands and take pictures whenever I wanted without any words from the teachers. Cameras weren't allowed during school at my school (like cellphones) so it was kind of a biggish deal].
Now why does this matter to you? Well my point (no pun intended) is that even though I had a regular little Point-n-Shoot camera I used it as if I was using a top of the line piece of equipment. I used it knowing that I was not ready for the VERY (relatively) expensive DSLR I now own, but I knew that when I would "outgrow" the PnS it would be time for me to go to the next level. That moment was 5 months after I got the Casio. I started feeling limited by the Aperture settings, the frame size, the speed, and lack of control I now understood I would have in a DSLR.
Cameras and photography equipment can be extremely expensive. It is very important to know when it is time to go to the next level, and sometimes even when that time comes you may not have the money for the equipment. So in order to make sure you have that money sooner rather than later, only buy things you know you will use very often and will chip away the limitations you feel are present.
Consider what the equipment will be used for, why you need it, if there is something that may serve the same purpose and cost cheaper, and if you will actually want to use it (this is a very big factor; the more you desire to use it, the more chances it has in paying for itself).
It's been almost a year and I now own a DSLR with 2 lenses, one cost me an amazing $125 dollars (canon 50mm 1.8 lens. Lenses can cost in the thousands so a very good lens for under $150 is amazing) and the other was given to me as a gift by another photographer. I also have a flash that cost me $250, but I also spent about 1.5 months researching flashes after I realized I needed one (especially since I was doing event photography at night for 2000 people).
Some examples of saving money on things you may need are:
-Use display boards as a reflector (can cost maybe $1) instead of a $30-$80 reflector.
-Use bed sheets as a background rather than using those expensive rolls of cloth (can cost a lot).
-Get a friends help during a photoshoot instead of paying for an assistant. I have a lot of friends that help me out and in return I take a couple of pictures of them and give it to them for free.
-If you get to the point where you want to show off your pictures to the world use free internet services like Facebook, Google+, and other places)
-Always have an eye on your surroundings, a piece of wood on the ground may serve as your next background, a piece of white paper can be used as a reflector, and even a couple of bricks can help raise your eye level without the need of a ladder.
If you have any questions, comments, or answers make sure to comment below or pop me an email.
Keep Snappin',
ravimi
Cool stuff :) |
It's a point and shoot camera that I spent MONTHS researching because I had a budget, and I knew if I was going to buy something that I was going to make into a hobby then it was going to be the most bang for the buck. Anyways this camera served me well, so well it last me about 5 months. I'm not being sarcastic. This Point-n-Shoot camera opened the doors of the photographic world to me. I took it EVERYWHERE and for those 5 months I took more than 10 thousand pictures. I used it so much that I joined my schools yearbook team and actually became the unofficial school photographer [I was allowed to carry my camera in my hands and take pictures whenever I wanted without any words from the teachers. Cameras weren't allowed during school at my school (like cellphones) so it was kind of a biggish deal].
Now why does this matter to you? Well my point (no pun intended) is that even though I had a regular little Point-n-Shoot camera I used it as if I was using a top of the line piece of equipment. I used it knowing that I was not ready for the VERY (relatively) expensive DSLR I now own, but I knew that when I would "outgrow" the PnS it would be time for me to go to the next level. That moment was 5 months after I got the Casio. I started feeling limited by the Aperture settings, the frame size, the speed, and lack of control I now understood I would have in a DSLR.
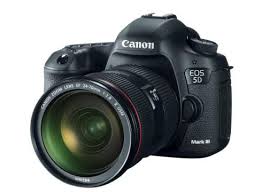
Awesome to own, but not so awesome for the pockets ;) |
Consider what the equipment will be used for, why you need it, if there is something that may serve the same purpose and cost cheaper, and if you will actually want to use it (this is a very big factor; the more you desire to use it, the more chances it has in paying for itself).
It's been almost a year and I now own a DSLR with 2 lenses, one cost me an amazing $125 dollars (canon 50mm 1.8 lens. Lenses can cost in the thousands so a very good lens for under $150 is amazing) and the other was given to me as a gift by another photographer. I also have a flash that cost me $250, but I also spent about 1.5 months researching flashes after I realized I needed one (especially since I was doing event photography at night for 2000 people).
Some examples of saving money on things you may need are:
-Use display boards as a reflector (can cost maybe $1) instead of a $30-$80 reflector.
-Use bed sheets as a background rather than using those expensive rolls of cloth (can cost a lot).
-Get a friends help during a photoshoot instead of paying for an assistant. I have a lot of friends that help me out and in return I take a couple of pictures of them and give it to them for free.
-If you get to the point where you want to show off your pictures to the world use free internet services like Facebook, Google+, and other places)
-Always have an eye on your surroundings, a piece of wood on the ground may serve as your next background, a piece of white paper can be used as a reflector, and even a couple of bricks can help raise your eye level without the need of a ladder.
If you have any questions, comments, or answers make sure to comment below or pop me an email.
![]() |
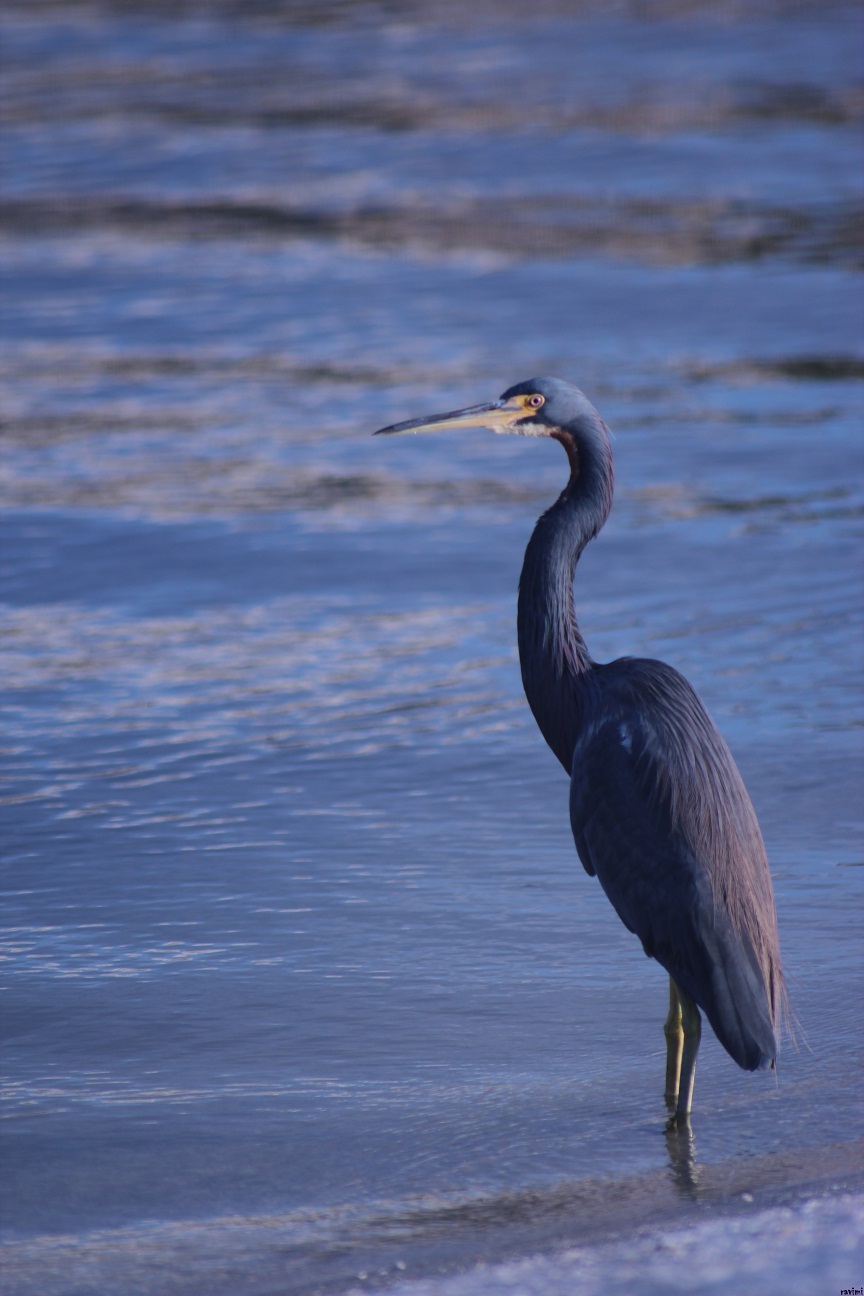
I took this while standing on a brick. The shadow under the flower is actually a fence so I needed something to see over the fence. |
Keep Snappin',
ravimi
Saturday, June 2, 2012
Photo and Personal Style
I took this today at my friends party. I love this image because of how much it shows the girls personality: huge amount of energy and wonderful smile. The details of the image are below the image, all the images I will be posting on this blog along with ALL the other places I post consist of photographs straight from the camera. I'm trying to build a name for myself as a straight out of camera photographer; some may call it crazy, others stupid (for valid reasons that I do understand), BUT I have decided this path therefore I will follow it, and so far it has worked to my expectations, and beyond. Also! please forgive me for grammar mistakes and everything else haha, English grammar is not my forte.
If you have any questions about my pictures or photography over all send me a message or comment below (comments are preferred since they may serve the purpose of answering the question for everyone who sees it.)
Keep Snappin',
Subscribe to:
Posts (Atom)