Saturday, November 10, 2012

Photo and Personal Style ~ Photography called Street, Part 2

I couldn't wait any longer, I had to go. I had to breath that city air. I had to walk across those car infested streets. And most importantly, I had to photograph it all.

I went back on the streets two days after I had first gone, as a photographer. The atmosphere just pulled me in like a vacuum collecting dust from a shaggy carpet. I started off my second day completely different compared to my first day, I was full of confidence and desire of capturing the city. I began with an image that I feel correctly separates the multiple elements of tampa's downtown  park.


Then something awesome happened. I encountered the "City Posse" as I'd like to call them. Separate  they all had character to spare, but together they created such an amazing scene in my mind. But why write about it when I can show you....


After I had taken this picture the two dudes on bikes began doing some of their BMX tricks and I couldn't help take pictures. 


And finish it off with a portrait!


City Alive

I continued on my journey through the city and encountered more of the things that had originally sucked my attention from my first visit. I began to see more of a subtleness to the city life, that lived inside the insanity. This included:

A traveling band, on bike
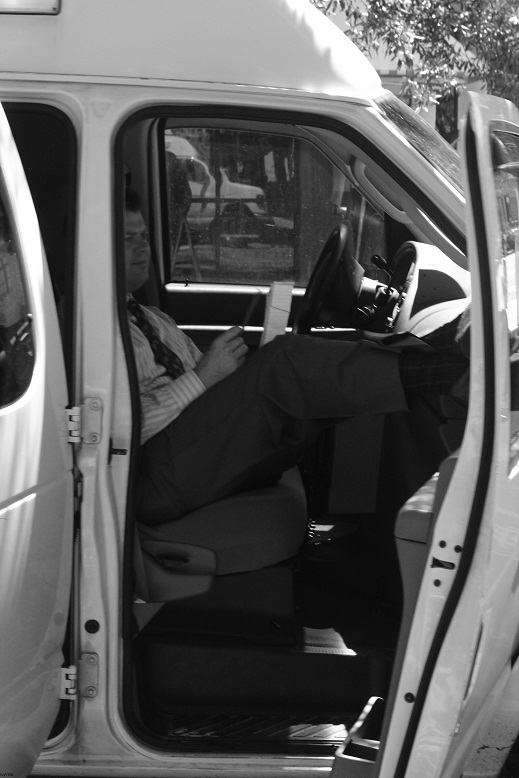
The relationships between the city workers 
Just seeing these "raw" moments made me feel the sense of being a scribe for human life in the city, just like the first time I came. 

And then a style revealed itself:

I call this "Mr. Jackson"
This one is "Runway Street"
The character these two individuals gave made me feel like I was watching super models from 1950's Bronx, it just blew me away.

The Picture

After encountering the "Duo from Bronx" I had decided to return to the park I had started at, but I took a different route. I'm so glad I did.
I decided to take a path between some buildings (instead of the sidewalk) and while I was walking I saw a giant hole between two buildings. It gave me this kind of vibe that means I'm looking at something unique, so I studied it further and this is what I saw.


This is by far one of my favorite pictures that I have taken. Since I do no editing of my pictures after pressing the shutter I took about twenty pictures (good ones) before I felt confident enough to look away. It was another story trying to walk away. 

The Park

At the park I found a large group of children playing in the Fountain Springs and it was awesome seeing the incredible smiles on their faces from simply running through jets of water. I got some really awesome pictures of the children playing, while trying to not seem like a creeper to the parents haha:


It was such an incredible day. Being able to experience such moments in the lives of other individuals, and capture incredible parts of the city was what makes street photography an art that I think will never stop blowing people's minds, especially my own.

I hope you enjoyed reading this blog. I've been very busy for the past couple of months with college as a premed student (I'm a self taught photographer). But I hope the length of this post makes up for the time lost :). 

Contact me if you have any questions.

With just one click the soul is captured and displayed for the world to be inspired.
Ravimi Photography

Monday, July 16, 2012

Photo and Personal Style ~ Photography called Street

Grab my camera and my 50mm lens, drive into the Downtown area, walk up to a random stranger whip out the Canon AND.....stand there. lol, yup that's what happened. It's incredibly hard and difficult (for the first time ever) to take a picture of someone completely random in the streets. I'd have an easier time taking pictures of a tiger while I'm inside the cage with a Philly Cheese tied onto my back. 

Well once I got over the idea of creeper status being hung around my neck, I decided to go for it. It was still difficult, this was one of my first captures:


Suckish work for what I hold myself to. But I kept on going and working for those magical images I had seen on the web to make inspiration and desire kick me out into the streets. As I progressed throughout my first day out on the streets the first thing I noticed was how artistic the city can be. I never really noticed it since I never actually took the perspective of a photographer in the city. Finding this out gave me a little bit more inspiration and I started getting better pics:


The more pics I took the more I began to start figuring the best things to do in order to feel more comfortable and produce better pics; I began talking to people and getting to know them a bit and my usual "pick-up line" was, "Hi! I'm a street photographer, can I get a picture?", and it worked like a charm every single time: 


Love this one
By the end of the day I had experienced a field of photography that was completely foreign to me, before that point. When I had only about 1 hour left I began to experiment a bit and like a rock to the face I discovered the ABSOLUTE MAGIC of "Shooting from the Hip". It was like a Chocolate Milk: AMAZING lol. Anyways, I started doing some interesting angles:


And as I had mentioned before I discovered the magic of City Architectural Photography:


With the end of the day coming and finally getting home and taking a shower after the Florida rain had me more wet than a lake I started reflecting on my latest adventure, and I felt realized a new connection in my life. I felt personally involved in the lives of the complete strangers I had photographed. I felt like they would represent a relationship in my life completely separated but not unaware of their existence. Seeing the "typical" business person walk around town and the Homeless (some within a family of homeless, which is something incredible that I realized, others completely separated from the world) sitting on the side of the road or selling little crosses made of palm leaves made me feel like I was the author of their novels; their personal Scribe. It was aw inspiring to feel that for someone I had never met, and it was something I had never felt with anyone else, even if I knew them. This feeling was what made me go back.....to be continued.

Thursday, July 5, 2012

Photo TIPS! ~ "Fireworks, Lightning and Birds"

So today I will be doing a post on a topic that was requested: Fireworks, Lightning, and Birds. In essence I will be talking about speed photography and precision (for the Bird and Lighting photography). With my explanation for each I will include a picture (except for lightning photography since I haven't been able to practice that one recently; therefore, lack the images). I will try to make each explanation as short and full of content as possible.

Fireworks!


Yesterday was the 4th of July! which means the left over fireworks will be in the sky tonight and this will make great practice for those who want to try this out. Taking great pictures of fireworks can be very difficult because you have to figure out WHERE the explosion will be and (harder part) WHEN and how long the explosion will be.

WHERE:

The simplest way to figure out the direction in which a firework will head and where it explodes is to have an experience reference (lol don't look it up on Google, it's my own made up word), in other words, a past experience that you can refer too. To build this experience reference you just have to first experience what you want to capture in a photograph before actually attempting the shot. Shoot a couple of fireworks up in the air (or watch others do it) and pinpoint the area where the fireworks most explode. Of course this area will vary greatly if you use a different firework every single time so try to make it easier by watching an area that has at least 2 or 3 explosions from the same type of firework.
Next,
you have to set up your camera settings. The picture I took below will have the information for what settings I used.
ISO 800
1/500 Shutter Speed
f/13 Aperture
50mm
This image was taken at midnight on New Years and it was pitch black outside (when there were no fireworks exploding). I had experience reference already when I took this because there were already fireworks that had been fired so that made this image a lot easier to capture since I had an idea WHERE it would explode. Since the explosion is bright I had a faster shutter speed and high Aperture # because I wanted to make it very dark without having to use a super high Shutter speed. These settings will be different for different fireworks and how bright/dark the night is, but you can use this as a reference for your first time.

WHEN:

This can be figured out the same way as described in WHERE; with an experience reference. Watch a couple of fireworks in the sky, count the seconds from launch to explosion. Once the firework launches start counting 1-Mississippi, 2-Mississippi, 3-Mississippi, etc until the firework explodes in the sky. Make sure that the fireworks you are counting are all the same, if you don't you will have completely different timings for each explosion and you'll be more confused than when you started. Once you have the timing down you can then decide when you will press the shutter button. I like the full explosion effect and mid explosion so I press the shutter button .5-1sec (about) after the explosion and then 2-4 seconds for the full explosion.

Lightning!


Lightning isn't as hard to capture as birds or fireworks but it takes a lot more luck in my opinion (not as much as flying birds though). To capture lightning you do the complete opposite of what I did with the fireworks image. In order to capture the image you have to turn the shutter speed into a long exposed shot which means the camera will be taking a single picture for a much longer period. First make sure your Shutter Speed is longer than 1 second (to do this just keep moving your shutter speed down until it goes from 1/# to #. (ex: 1/20sec to 2sec). The  shutter speed will affect how wide your Aperture will be; the longer the Shutter Speed the higher the f/stop # (Aperture). So with a shutter speed of 10 seconds you will want a very closed Aperture somewhere greater than f/15. Since the amount of light varies per lightning strike you will have to do a lot of changing. The reason we leave the Shutter Speed long is to make it easier to capture the lightning. The camera sensor only works with light so once the lightning strikes the light will be imprinted into the sensor.

Remember:
-Very long Shutter speed greater than 1 second (between 5-10 is good)
-Very small Aperture to avoid any other light sources from washing out the light from the lightning, and since the shutter is open for a long period it lowers the amount of light being registered by the sensor; therefore, only the lightning will show up in the picture.
-Patience and Persistence. (PnP)

Birds!


To take pictures of birds flying you will need a lot of PnP (Patience and Persistence). Have a Shutter Speed that is high enough to stop the bird in flight while also removing the blur created by the birds motion. A good Shutter Speed would be any above 1/800 (you can also do less since you are moving the lens with the bird but 1/800 is a pretty secure base number) when taking close up bird images, but the further away the bird is the lower the shutter speed can be. The Aperture can vary depending on what you want in focus: only the bird (Aperture less than 5), bird and background (Aperture greater than 5). The higher the f/stop(Aperture) # the easier it will to get an image with the bird focused since the DOF(Depth of Field) is much greater. Here are a couple examples of my in-flight bird photography.
ISO 400
1/3200 Shutter Speed
4.5 Aperture
50mm
ISO 400
1/3200 Shutter Speed
4.5 Aperture
50mm

ISO 100
1/2000 Shutter Speed
5.6 Aperture
300mm
ISO 100
1/500 Shutter Speed
5.6 Aperture
300mm
When I do bird photography I do 1 of 2 things: I find a flock of birds on the ground and lay on the ground in front of the group pointing my camera up, then I get a friend to scare the crap out of the birds from the opposite side of where I am so that when they fly away they fly towards/above me, and I fire away. The other option is standing in one place and trying to predict the flight pattern of the birds and have the camera set up pointing towards that direction.


Keep on Snappin',
Ravimi

Monday, July 2, 2012

One of those Randoms! ~ "Parade!"

So I've been out for a while because of a summer program I was a staff member at and other events (after the summer program) that I wanted to photograph and use as my back-on-track photos (so I avoided posting before then). So this post will be dedicated to showing some of the best pictures I took on that event, which happened to be the annual St. Pete Pride Parade! I hope you enjoy and if you want to see more just visit my website.

Remember to SUBSCRIBE! and share this with your other friends if you like it. If you have any questions feel free to leave a comment or send me an email.

Keep on Snappin',
Ravimi

***Update: We also have a new SUBSCRIBER!!!! (rockets shoot into the air while elephants run off cliffs and land on trampolines that launch them over the moon). Thank you Horacio for joining us on RPB!

ISO 100
1/400 Shutter Speed
5 Aperture
50mm
ISO 100
1/1000 Shutter Speed
5.6 Aperture
50mm
ISO 100
1/320 Shutter Speed
5.6 Aperture
50mm
ISO 100
1/320 Shutter Speed
5.6 Aperture
50mm
ISO 100
1/1000 Shutter Speed
5.6 Aperture
50mm

Tuesday, June 19, 2012

Photo TIPS! ~ Bokeh

"BOKEH!!!!" 

You might have seen that over the internet in the comments of a photograph, or even as the name of a  photograph, but what does Bokeh mean?
First lets start off with clearing up some confusion I have seen related to Bokeh. One of the big confusions that I see very often is confusing Bokeh with the actual background (the things that are in the background) but Bokeh is related to how the background looks when it is blurred. To further explain the confusion lets use one of my pictures:


If you look towards the right of the picture (the eagles left side) you might notice how the ferns (the green plants, also located under the eagle) begin to blur. The blur itself is the Bokeh. If you look even closer, the blur begins to resemble circles. The reason it is shaped like a circle is because the lens, in which the light enters, is circular.


*If you grab a piece of paper and cut a star shaped hole into it about the size of the front of the lens, and place it on the lens the Bokeh will become star shapped (once again, the shape of the lens where the light enters determines the shape of the Bokeh). 

The confusion I see most often is thinking that the Bokeh is the background itself, and NOT the blur. The blur is what determines Bokeh, if the background is very clear and focused (normally when using small Aperture Click here for Tutorial on Aperture) and there is no blur then there is no Bokeh.
A picture with no Bokeh looks like this:

Notice how the entire background is in-focus and there is no blur.  

Now how do you make Bokeh? Well it's very simple. 

Bokeh is created when the Aperture of the lens is very large (small f/stop #) and there is a small amount of focused space relative to the size of the background. What that means is that if I have an Aperture of f8 (8 f/stop) and I am taking a picture of a person standing 5ft away from me, and we are on a field that is 300yd long, then the background will be out of focus because the 8 f/stop number is not capable of focusing so much space in the background. In other words it is possible to create Bokeh (blurry background) with a large f/stop #, as long as the background contains a space larger than the in-focus area.
The easiest way to achieve Bokeh is to have a very large Aperture (low f/stop #) like f1.8 (f1.8 = 1.8 f/stop) or any number usually lower than f5.6. This will create a very small amount of in-focus area when taking the picture and so if the background goes about 15ft further than the subject in focus then you should have the blurred effect: like this:

I used a VERY small f/stop # (Big Aperture) therefore the background is completely
blurred.

Good/Bad Bokeh

This, like art itself, is very relative to taste. Some people might consider Good Bokeh bad, and Bad Bokeh good. The background of the picture above of the flower might look nice to some, but ugly to others. In reality I do not know of, and doubt the existence, of a standard for depicting the quality of Bokeh. Bokeh is like air, it is what it is, and you either like it or not (I hope you like air for your own sake). So you are the one that determines the worth of Bokeh, but only for yourself. I love the image of the flower above because of the HUGE contrast there is between the in-focus flower, and the completely burred background. Yet the smooth texture of the flower blends in quite a lot with the smooth background.

If you have any questions let me know by posting in the comments section under the post. Let me know if you enjoyed the post, and if it was helpful. Remember to SUBSCRIBE and if you would like a free picture (after subscribing of course ;)] the follow this Link.

Keep on Snappin',
Ravimi

Monday, June 18, 2012

One of those Randoms! ~ "Collage Photography"

So while I was navigating through my Blog I noticed something interesting; when I scrolled the page to just the right spot, the picture on the foreground matched up with the picture in the background! I saw this and I thought of how awesome it would be to put them together, but then I remembered that I would never published any edited pictures! Anyways I thought about it pretty hard and decided to do it for the fun and the art I could be making, almost forgetting it's a photograph and focusing on the Collage art aspect and that I would give it away for free to followers of my photography. Yes, the picture below is for you, it's a thank you for signing up on any of my social media sites and following my progress as a photographer.

Fun Fact: All the images used to make this collage were taken on the same day, within the same hour, and for the same theme: Sunset photography. Also, almost all the pictures are taken towards the same direction and are positioned (on the Collage) similar to where the were taken.

Share this with everyone you know and get them to SUBSCRIBE! and if you haven't signed up yet and would like to download this picture then make sure to SUBSCRIBE! Stay tuned for more Collages in the future.


Keep on Snappin',
Ravimi


Sunset Miracles 

Sunday, June 17, 2012

Photo and Personal Style ~ Continuation

Here are some more pictures I've taken! I hope you enjoy.

ISO 100
1/1250 Shutter Speed
2.5 Aperture
50 mm 
ISO 100
1/4000 Shutter Speed
5.6 Aperture
300mm 
ISO 100
1/4000 Shutter Speed
5.6 Aperture
300mm 
ISO 100
1/4000 Shutter Speed
4.0 Aperture
75mm 
ISO 200
1/125 Shutter Speed
4.5 Aperture
50mm 
ISO 200
1/125 Shutter Speed
6.3 Aperture
50mm 
ISO 100
1/250 Shutter Speed
13 Aperture
50mm 
ISO 100
1/400 Shutter Speed
5.6 Aperture
300mm 
ISO 100
1/200 Shutter Speed
5.6 Aperture
300mm 
Keep on Snappin',

Ravimi

Photography